Easy Ballerina Drawing: Step-by-Step
In this guide
- What You'll Need
- Step 1: Draw the Head and Ballet Bun
- Step 2: Add a Peaceful Face
- Step 3: Sketch the Bodice
- Step 4: Curve the Arms Overhead
- Step 5: Draw the Twirly Tutu
- Step 6: Pose the Legs
- Step 7: Add Pointe Shoes and Ribbons
- Step 8: Color and Set the Stage
- Tips to Make Your Ballerina Drawing Even Cuter
- FAQ
Twirl, leap, land — now freeze that moment on paper. Learning how to draw a ballerina is really about capturing one graceful pose, and we’ve picked the friendliest one there is: arms curved overhead, one toe pointed, tutu mid-twirl. 🩰
If figures make you nervous, breathe easy. We’ll use the same gentle shape-stacking from our easy girl drawing guide, and the tutu — a ballerina’s best accessory — conveniently covers the trickiest part of any figure. Dancers and artists agree: it’s all about balance, one step at a time.
What You’ll Need
- Paper
- A pencil
- An eraser
- Optional: markers or colored pencils
Step 1: Draw the Head and Ballet Bun
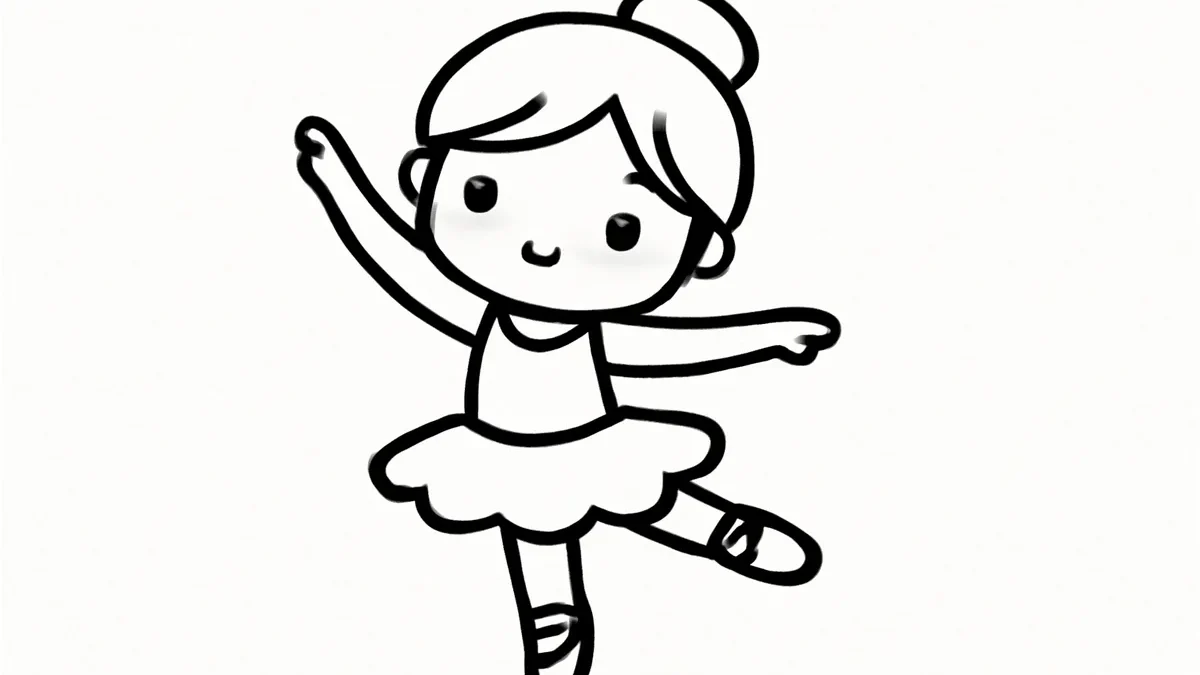
Draw a circle for the head in the upper part of your paper, leaving room below for a full standing figure. Add a small circle sitting right on top — the classic ballet bun. Sweep two or three smooth lines from the forehead back toward the bun so the hair looks neatly pulled up.
Step 2: Add a Peaceful Face
Ballerinas often look serene mid-dance, so draw two gently closed eyes — simple curved lines with a couple of tiny lashes — a dot nose, and a soft smile. This calm expression makes the whole drawing feel like slow, beautiful music.
Step 3: Sketch the Bodice
From a slim neck, draw a small triangle-ish bodice that narrows to the waist, like an ice cream cone standing on its point. Add two thin strap lines over the shoulders. Keep the torso little — a petite bodice makes the tutu look extra dramatic later.
Step 4: Curve the Arms Overhead
Draw both arms rising from the shoulders and curving up over her head, fingertips almost touching — like she’s holding an invisible beach ball above her bun. Use one smooth line for each arm if you can; slow, confident curves beat many sketchy ones. This oval arm position is real ballet, called fifth position.
Step 5: Draw the Twirly Tutu
Here’s the showstopper. From her waist, draw a wide skirt flaring out on both sides like an open umbrella, with a bouncy, scalloped bottom edge. Add a few short lines fanning from the waist toward the ruffles so the fabric looks layered and full of air. Bonus: whatever happens under that tutu is nobody’s business, which makes the next step much less scary.
Step 6: Pose the Legs
From under the tutu, draw one long straight leg holding her up, toes pointed like an arrow. Draw the second leg bent, with its pointed toe touching the standing knee — a beloved ballet pose called passé that makes any figure look like a true dancer. Keep both legs slim and smooth.
Step 7: Add Pointe Shoes and Ribbons
Cap each pointed foot with a little slipper shape, then draw two thin lines crossing in an X up each ankle — the famous satin ribbons. A ballerina rises on the very tip of her shoe, so let the standing foot balance right on its point, like a spinning top.
Step 8: Color and Set the Stage
Classic ballet pink is lovely, but lavender, mint, or pale blue tutus are just as dreamy. Add a simple line for the stage floor, a soft yellow spotlight circle around her, and a few sparkles in the air. Shade one side of the tutu lightly so it looks round and full. ✨
Tips to Make Your Ballerina Drawing Even Cuter
- Tuck a tiny flower or bow into her bun.
- Draw a small curtain edge at the top corners for instant theater vibes.
- Add a bunny or kitten in the corner copying her pose — the understudy.
- Scatter rose petals landing around her feet after a great show.
- Try a chibi ballerina: big head, tiny tutu, maximum charm.
FAQ
Is a ballerina hard to draw?
The pose looks fancy, but the tutu hides the hips and the arms follow one smooth oval, so it’s kinder to beginners than a regular standing figure. Take the arms slowly and the rest falls into place.
How long does a ballerina drawing take?
Around 20 minutes for the full figure with color. The arms and legs may want a second try — even real dancers rehearse before the recital, and erasers are cheaper than ballet lessons.
What age is this tutorial for?
Ages 7 and up can follow along comfortably. Younger artists can simplify the legs into two straight lines and still end up with a very proud dancer.
Curtain call — your ballerina is ready for her standing ovation, and so are you. To watch figures like this drawn stroke by stroke, spin over to our YouTube channel. And if you loved this, try our how to draw a person guide next and build your whole cast of characters. 🎨