How to Draw a Buffalo: Easy Step-by-Step
In this guide
- What You'll Need
- Step 1: Draw the Big Body Oval
- Step 2: Add the Round Head
- Step 3: Shape the Snout
- Step 4: Give It Horns and Ears
- Step 5: Add Four Sturdy Legs
- Step 6: Fluff Up the Mane and Hump
- Step 7: Draw the Face and Tail
- Step 8: Color Your Buffalo
- Tips to Make Your Buffalo Drawing Even Cuter
- FAQ
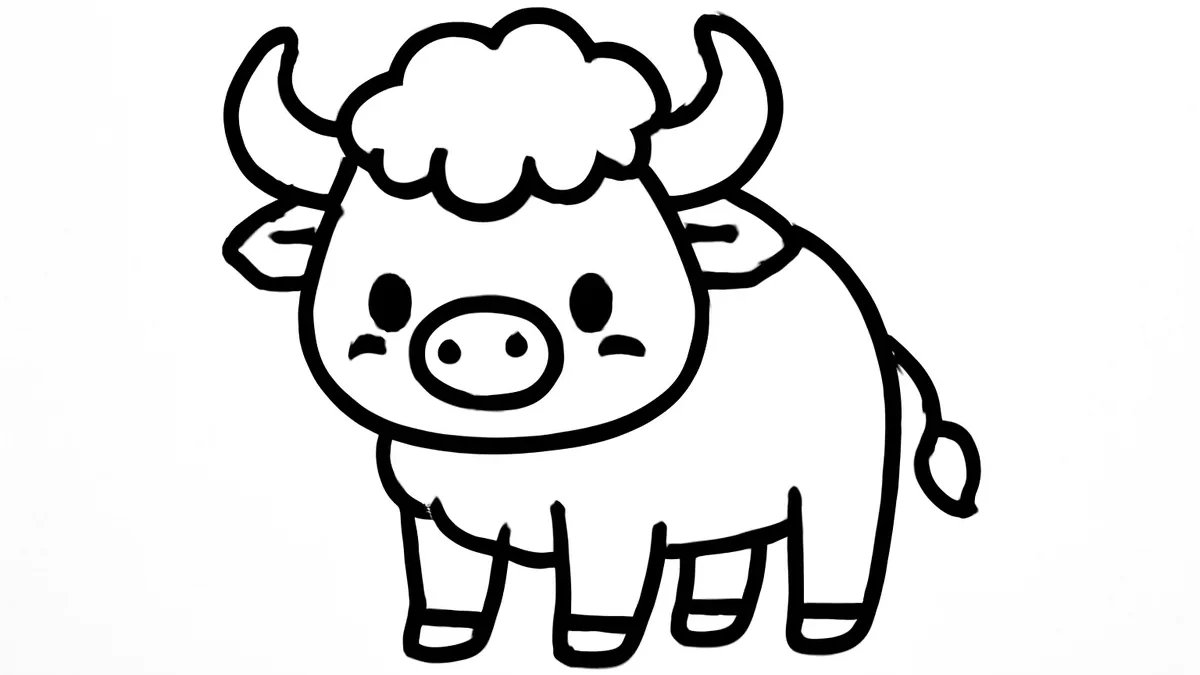
Have you ever noticed that a buffalo is basically a giant fluffy cloud with legs? Once you see it that way, learning how to draw a buffalo stops feeling intimidating and starts feeling like doodling a very large, very shaggy teddy bear. ✏️
In this guide we’ll build our buffalo from two simple shapes — a big oval body and a round head — then pile on the fluff. If you’ve already sketched our cow drawing, you’ll recognize a lot of the same friendly moves here, just with extra shag and a mighty shoulder hump.
What You’ll Need
- Paper
- A pencil
- An eraser
- Optional: a brown marker or crayon
Step 1: Draw the Big Body Oval
Start with a large oval lying on its side, filling the middle of your page. Make the left end slightly taller than the right — that raised part will become the buffalo’s famous shoulder hump. Keep your lines light so they’re easy to adjust. If your oval leans forward a little, even better — buffalo always look like they’re plodding somewhere important.
Step 2: Add the Round Head
At the taller end of the oval, draw a circle that overlaps the body and sits low, near the ground. Buffalo carry their heads down low, like they’re always sniffing for the best grass. Erase the line where the circle and oval overlap.
Step 3: Shape the Snout
On the lower front of the head, add a wide, rounded snout — picture half a hamburger bun sticking out. Draw two little dots for nostrils and a short curved line underneath for a calm, gentle mouth.
Step 4: Give It Horns and Ears
On top of the head, draw two short horns that curve upward like parentheses lying on their backs. Just below each horn, tuck in a small rounded ear poking out sideways. Keep the horns stubby — cute buffalo don’t need big pointy ones.
Step 5: Add Four Sturdy Legs
Drop four thick, straight legs down from the body, like sturdy table legs. Two in front, two in back, each ending in a simple rounded hoof. Buffalo legs look surprisingly slim compared to that huge body, so don’t make them too chunky. A faint line across each ankle hints at the fur that hangs over the hooves like baggy socks.
Step 6: Fluff Up the Mane and Hump
Now the fun part: trace over the hump, head, and chest with short, scribbly zigzag lines to make shaggy fur. Let the fluff hang down under the chin like a beard. The back half of the body stays smooth — that contrast is what makes a buffalo look like a buffalo.
Step 7: Draw the Face and Tail
Add two oval eyes with a tiny white sparkle dot in each one. Then draw a thin tail swishing off the back end, finished with a little paintbrush tuft of fur. A couple of eyelash lines make your buffalo extra sweet.
Step 8: Color Your Buffalo
Color the shaggy front in dark chocolate brown and the smooth back half in a lighter caramel shade. Add a strip of green grass under those hooves and maybe a small yellow sun above. If the two browns blend together on paper, trace the shaggy section’s outline slightly darker so the fluff stands out. Done — one gentle giant, ready to roam your sketchbook.
Tips to Make Your Buffalo Drawing Even Cuter
- Oversize the head and shrink the body for an adorable baby buffalo calf.
- Add a tiny bird perched on the hump — buffalo don’t mind sharing.
- Rosy pink circles on the cheeks soften that big shaggy face instantly.
- Draw a flower dangling from its mouth like it’s mid-snack.
- Sketch a second buffalo in the distance as a simple brown blob with legs.
- On a chilly-morning scene, add two small cloud puffs by the nose for frosty breath.
FAQ
Is a buffalo hard to draw?
No — the body is one big oval and the shaggy fur is just relaxed scribbling. The zigzag fluff actually hides wobbly lines, which makes buffalo very forgiving.
How long does a buffalo drawing take?
Plan on about 15 minutes for the sketch. The shaggy mane is the slowest part, but it’s also the most relaxing.
What’s the difference between drawing a buffalo and a bison?
For a cute cartoon, treat them the same: big hump, shaggy front, short curved horns. Nobody at the drawing table will quibble — and both versions look wonderful standing on a grassy plain with a couple of clouds overhead.
Look at that — a whole buffalo, built from an oval and a circle. Keep that pencil moving, and if you’d like to watch these steps happen live, visit our YouTube channel for follow-along videos. Loved this shaggy friend? Wander over to our easy goat drawing next and keep the farm-and-field crew growing. 🐾