Elf Drawing: Easy Step-by-Step Guide for Beginners
In this guide
- What You'll Need
- Step 1: Start with a Big Round Head
- Step 2: Add the Pointy Hat
- Step 3: Draw the Pointed Ears
- Step 4: Give Your Elf a Happy Face
- Step 5: Sketch the Little Body
- Step 6: Add Arms and Mitten Hands
- Step 7: Draw the Legs and Curly Shoes
- Step 8: Add the Belt and Collar
- Step 9: Ink and Color Your Elf
- Tips to Make Your Elf Drawing Even Cuter
- FAQ
Quick question: what has pointy ears, a jingle-bell hat, and never stops smiling? Santa’s littlest helper, of course! Today we’re learning how to draw an elf — a cheerful workshop worker built entirely from triangles, circles, and a few happy squiggles. No fancy skills required, just a pencil and about fifteen minutes.
Elves are wonderful practice for beginners because their proportions are playful on purpose. A big head, a small body, and oversized shoes aren’t mistakes here — they’re the whole look. Once your elf is finished, he’ll fit right into a scene with the big man himself from our Santa Claus drawing tutorial. ✨
Ready to report for workshop duty? Let’s sketch. Keep your first lines whisper-light — we’ll darken the keepers at the very end, so early wobbles cost you nothing.
What You’ll Need
- Paper
- A pencil
- An eraser
- Optional: green and red markers or colored pencils
Step 1: Start with a Big Round Head
Draw a big circle in the upper half of your paper. Elves are all about that oversized-head charm, so make it generous — it should take up almost a third of your whole drawing. Keep your pencil light for now; this is just the foundation.
Step 2: Add the Pointy Hat
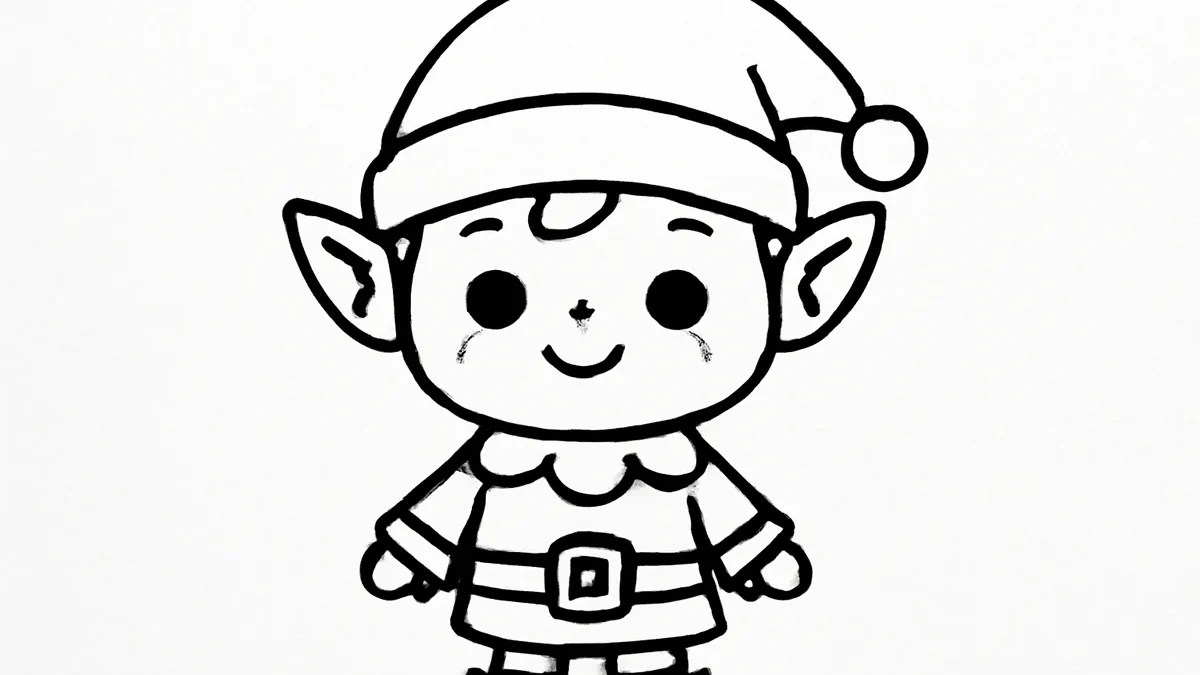
On top of the head, draw a tall triangle that leans and flops over to one side, like a sock that fell asleep. Add a small circle at the drooping tip for the pom-pom, and a wavy band along the bottom edge where the hat meets the head. That floppy tilt is what gives your elf personality.
Step 3: Draw the Pointed Ears
On each side of the head, draw a small triangle sticking outward and slightly up, then round off the bottom corner where it joins the face. Elf ears peek out from under the hat like little leaf tips. Add a short curved line inside each one to show the inner ear.
Step 4: Give Your Elf a Happy Face
Place two dot eyes wide apart, about halfway down the face. Between and slightly below them, draw a round button nose. Underneath, sweep a wide open smile — a curve with a flat top, like a slice of watermelon. Two small circles on the cheeks make him extra rosy and jolly.
Step 5: Sketch the Little Body
Below the head, draw a small body shaped like a triangle with a rounded top — this is his tunic, wider at the bottom than the shoulders. Make the whole body shorter than the head; that squished proportion is what keeps him cute. Finish the bottom edge with a zigzag hem, like the trim on a tiny coat. A couple of short curved fold lines near the hem will make the fabric look like it’s swinging as he walks.
Step 6: Add Arms and Mitten Hands
From each shoulder, draw a skinny arm made of two short tube sections. Bend one arm up in a friendly wave and let the other rest by his side. End each arm with a rounded mitten — a plain oval with one little thumb bump is all you need.
Step 7: Draw the Legs and Curly Shoes
Under the tunic, drop two thin, straight legs. Now for the best part: the shoes! Draw each foot pointing outward, then curl the toe up and backward into a little spiral hook, like the tip of a candy cane. Pop a tiny circle bell on each curled toe. 🎨
Step 8: Add the Belt and Collar
Draw a band across the middle of the tunic for his belt, with a small square buckle at the center. At the neck, add a pointed collar — two little triangles meeting in the middle, like the petals of a flower folded down. These small details make him look properly dressed for the workshop.
Step 9: Ink and Color Your Elf
Go over your final lines with a pen or dark pencil, then erase the sketchy bits underneath. Classic elf colors are green for the hat and tunic, red for the collar and trim, and warm brown or black for the belt. Golden yellow bells and buckle add the finishing sparkle.
Tips to Make Your Elf Drawing Even Cuter
- Draw a wrapped present in his hands so he’s mid-delivery.
- Add stripes to his legs for classic candy-cane stockings.
- Tilt the eyes into little upside-down U shapes for a super-happy squint.
- Sprinkle a few snowflakes or stars around him to set the scene.
- Give him a candy cane to lean on like a tiny walking stick.
FAQ
Is an elf hard to draw for beginners?
No — this version uses only circles, triangles, and simple tubes. The trickiest part is the curly shoe, and even that is just a small spiral.
How long does an elf drawing take?
Plan on about 15 minutes for the sketch and another 10 if you color him in. It’s a perfect one-sitting holiday project.
What colors should an elf be?
Green and red are traditional, but there’s no rulebook in the workshop. Try purple and silver, or blue and white for a frosty look.
One jolly little helper, complete! Keep him company by drawing a whole crew in different poses — waving, jumping, carrying gifts. For more step-by-step fun in video form, come say hi on our YouTube channel at Hobbies for Fun. And if you loved this, try our easy Christmas tree drawing so your elf has something to decorate. You’ve got this! ✏️