How to Draw a Pug: Easy Step-by-Step
In this guide
- What You'll Need
- Step 1: Draw the Round Head
- Step 2: Fold Down the Ears
- Step 3: Add the Muzzle Patch
- Step 4: Place the Big Eyes
- Step 5: Squish In the Nose and Mouth
- Step 6: Wrinkle That Forehead
- Step 7: Build the Compact Body
- Step 8: Curl the Tail and Color
- Tips to Make Your Pug Drawing Even Cuter
- FAQ
Wrinkly forehead, squished nose, a tail like a cinnamon roll — pugs look like someone designed a dog specifically to be drawn. And truly, learning how to draw a pug is mostly about celebrating the squish: round head, round body, and a few well-placed wrinkle lines that do all the talking. 🐶
The best news? Pug faces are forgiving. Extra wrinkles, wonky eyes, a crooked smile — it all just reads as “more pug.” If you’ve sketched along with our dog drawing guide before, think of this as the deluxe wrinkly expansion pack.
What You’ll Need
- Paper
- A pencil
- An eraser
- Tan and dark brown colors (optional)
Step 1: Draw the Round Head
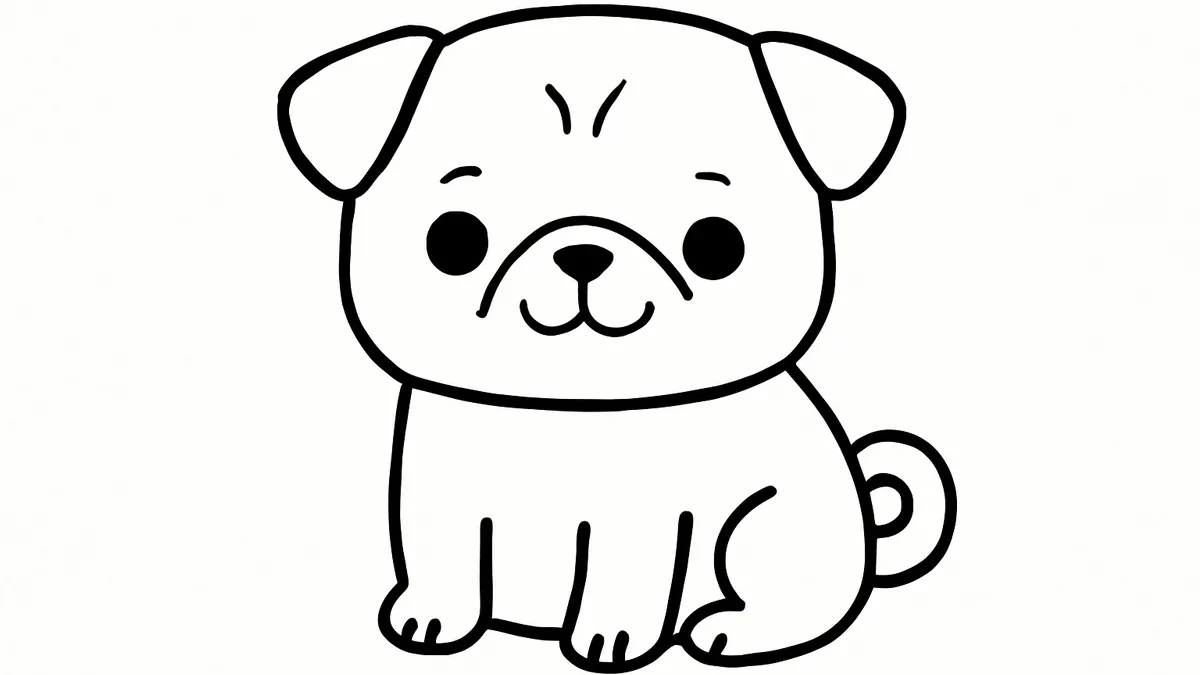
Start with a big circle in the upper half of your page, a touch wider than it is tall. Pug heads are gloriously round — no pointy snout to worry about, which already makes this easier than most dogs. Leave plenty of space below the circle, because the loaf-shaped body still needs a home.
Step 2: Fold Down the Ears
At the top of the head, draw two small flaps folding down and forward, like the corners of a pancake flopping over. Pug ears are little velvet triangles that droop rather than point — keep them soft and slightly uneven for charm.
Step 3: Add the Muzzle Patch
On the lower half of the face, draw a wide, soft shape like a rounded mask — broader than it is tall, covering where the nose and mouth will live. This patch will be colored darker later; that dark muzzle is one of the pug’s trademark features.
Step 4: Place the Big Eyes
Just above the muzzle patch, draw two large round eyes set wide apart — almost on the sides of the face. Make them big and glossy with white shine dots. Slightly bulgy, wide-set eyes are peak pug; if they look a little dramatic, you’ve done it right.
Step 5: Squish In the Nose and Mouth
In the middle of the muzzle patch, draw a small flat nose like a squashed rounded triangle. From its bottom, drop a short line into a wide, droopy w-shaped mouth. Let a tiny tongue tip poke out on one side — pugs rarely keep it in.
Step 6: Wrinkle That Forehead
Now the magic step. Draw two or three curved lines across the forehead, arcing gently between and above the eyes, like waves stacked on a beach. These few worried little wrinkles transform a generic dog into an unmistakable pug. Add one short crease beside each eye if you want extra concern — two wrinkles look thoughtful, three look deeply worried about dinner, and both are correct.
Step 7: Build the Compact Body
Below the head, draw a compact barrel of a body in a sitting pose — pugs are sturdy little loaves. Add two stubby front legs dropping straight down with small rounded paws, and a hint of a back haunch curving out at the side. Keep the body smaller than the head for maximum cute.
Step 8: Curl the Tail and Color
Perch the famous tail on the pug’s back: a tight spiral, like a cinnamon roll that took a wrong turn. Then color: warm fawn tan for the body, dark brown for the muzzle and ears, pink for the tongue. Leave the eye shines white, add a soft gray shadow under the sitting pose so your pug isn’t floating, and the portrait is complete. ✨
Tips to Make Your Pug Drawing Even Cuter
- Tilt the head a few degrees — the confused pug head-tilt is scientifically adorable. 🐾
- Draw a striped sweater or a little neckerchief on the body; pugs wear clothes better than most of us.
- Add a flying crumb and wide eyes for a “caught mid-snack” moment.
- Try a black pug — all dark gray with lighter highlights and the same white eye shines.
- Draw the mouth as a huge open smile with the tongue flying for full zoomies energy.
FAQ
Is a pug easy to draw for beginners?
Yes — rounder is better with pugs, so beginner-wobbly circles actually help. The forehead wrinkles are just two or three curved lines.
What makes a drawing look like a pug and not just any dog?
Four things: the dark flat muzzle, wide-set bulgy eyes, forehead wrinkles, and the tightly curled tail. Include all four and there’s zero doubt.
How long does a pug drawing take?
Ten to fifteen minutes with coloring. The wrinkles go faster than you’d think — it’s the cuteness that lingers.
Wrinkles drawn, tail curled, snack secured — that’s one loaf-shaped friend who’ll guard your sketchbook forever. Come watch pups and pals drawn by hand on our YouTube channel, and when you’re ready for a floofier challenge, our easy husky drawing is the perfect next dog on your leash. You’ve got this! 🎨